
As you can imagine our tech is always putting together custom gaming computers. So when our Junior tech wanted to give his brother something special for Xmas we had to help out. This would not only be a great gift but a learning experience for our Tech in training under the supervision of our “Windows Wizard” After all a tech needs to learn how to build a custom gaming computer

The dream of every gamer, designer, or computing enthusiast is to have a PC that is not just a powerhouse of performance but also a visual delight. With the right components, this dream can become a reality. Today, we’re going to take you through the process of building a custom PC that promises to deliver on both fronts. We’ll be using some of the best parts available, including the sleek Corsair 3000D RGB AIRFLOW Mid-Tower PC Case, a highly efficient Corsair iCUE LINK H150i RGB AIO Liquid CPU Cooler, and the lightning-fast Samsung 980 PRO SSD 1TB M.2 2280, to name a few.

Choosing the Right Components
When building a custom gaming computer the choice of components is paramount. Each part plays a critical role in the performance and aesthetics of the final build. Here are the components we’ve selected for our high-performance machine:
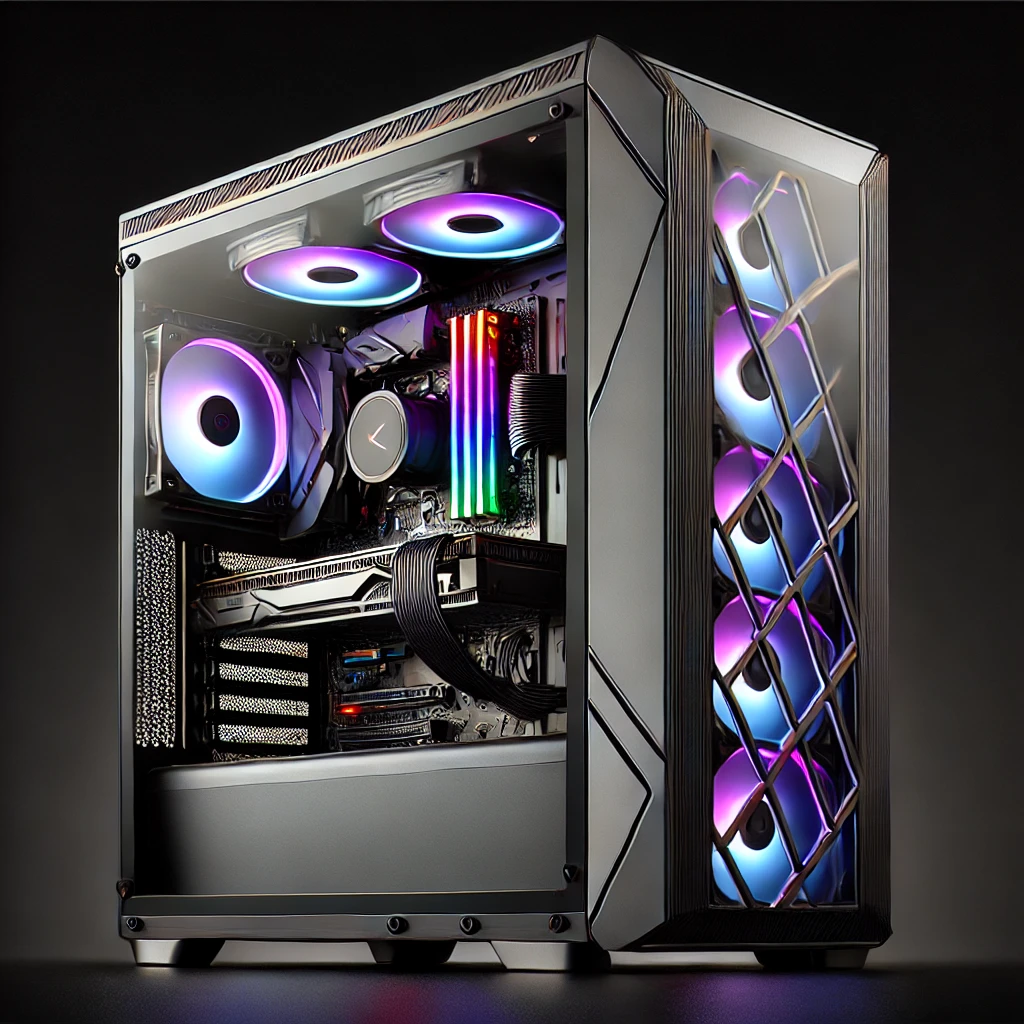
- Case: The Corsair 3000D RGB AIRFLOW Mid-Tower PC Case is not just about good looks; it’s designed to enhance the airflow, ensuring that your components stay cool even during intense gaming sessions.
- Cooling System: To keep the CPU temperature in check, we’ve picked the Corsair iCUE LINK H150i RGB AIO Liquid CPU Cooler. It’s efficient and quiet, and the RGB lighting adds that extra flair.
We decided that due to the games the end user tends to play the liquid cooling system was overkill and a good collection of fans was all was needed. This did save our client a bit of money.
- Storage: For ultra-fast load times and data transfer, the Samsung 980 PRO SSD 1TB M.2 2280 is a no-brainer. Its NVMe technology means you won’t be left waiting.
- Power Supply: Reliable power is crucial, and the Corsair 650W CV650 provides just that, ensuring stability for all your components.
- Fans: We’ll be adding both the iCUE LINK QX120 RGB 120mm PWM Fan and the iCUE AR120 Digital RGB 120mm PWM Fan. These fans not only cool your system but also add a customizable RGB lighting effect.
- Processor: At the heart of the PC is the AMD Ryzen 5 5500, a chip that offers excellent performance for gaming and multitasking without breaking the bank.
- Graphics Card: For those who want great gaming performance at a reasonable price, the SAPPHIRE AMD RADEON RX 7700 XT is an excellent choice.
- Motherboard: The Gigabyte B550M AORUS ELITE AX is a compact yet powerful motherboard with all the features you need for a modern build, including Wi-Fi.
- Memory: To handle all your multitasking needs, we’ve selected the G.SKILL Ripjaws V Series 32GB DDR4—a memory kit that combines capacity with speed.
- Operating System: To tie all the components together, Windows 11 offers the latest in performance and security.
The Assembly Process
- Preparation: Begin by grounding yourself to prevent static electricity from damaging the components. Lay out all the parts and tools you will need.
- Motherboard Setup: Install the CPU, RAM, and SSD onto the motherboard before placing it in the case. This makes the process easier.
- Installing the Motherboard: Once the motherboard is prepared, carefully place it inside the case and secure it with screws.
- Cooling System: Mount the Corsair iCUE LINK H150i RGB AIO Liquid CPU Cooler. Ensure that the thermal paste is applied correctly for optimal heat dissipation.
- Power Supply: Install the Corsair 650W CV650, ensuring all cables are routed neatly and plugged in correctly.
- Fans: Install both the iCUE LINK QX120 and the AR120 fans. Position them to create an effective airflow path within the case.
- Graphics Card: Insert the SAPPHIRE AMD RADEON RX 7700 XT into the motherboard’s PCIe slot and secure it.
- Cabling: Use the iCUE LINK Cable Kit for a clean and organized look. Proper cable management is key to airflow and aesthetics.
- Final Touches: Double-check all connections, close up the case, and power on your new PC. Install Windows 11, update drivers, and enjoy your creation!
Wrapping Up
Building a custom gaming computer can be a rewarding experience. Not only do you get a machine that’s tailored to your specific needs, but you also gain the satisfaction of having put it together yourself. Remember, the key to a successful build is patience and attention to detail. Take your time, follow the instructions, and you’ll end up with a PC that’s both powerful and beautiful.
As for our next topic, we’ll explore “Maximizing Your Custom PC’s Performance: Overclocking and Tuning Tips”. Stay tuned for a deep dive into safely pushing your custom PC to its limits for those who want even more speed and power.
We have a Time-lapse video of the computer being built but will need the permission of the people in the video before posting, So video and images of the finished product coming soon