
Your cart is currently empty!
This is part two of the Dragon Gaming Computer Case Mod. The original post was about creative brainstorming and the process of up with the composition and color pallet! This time around I am going to be talking about the physical aspects of the case modding process.
PReping the Case
Most people think that I could just start the case mod process by painting over the existing computer case paint, I wish that was true. The problem is that the paint they use with computer cases is designed to repel dust. This means that normal acrylic paint is not going to stick very well. Even if it does once the computer starts gaming and warms up to anywhere between 40-70 degrees the acrylic paint will start to separate from the metal. So I had to sand this all off …. SO MUCH SANDING!
Primer for a good surface
As an artist, I have learned that you need to have a good service before you start painting! There is nothing worse than to have an uneven coat of paint. This is more important when working on metal.

It was funny because, with this computer case, I had to sand off the black paint to add more black paint! The only visual difference is the primer has a mat finish.

Hand Painting LAyers
This is the part where most people lose their patience! Painting a computer case with this level of detail is going to take many many layers of paint. The idea is to bring a level or richness to the colour!
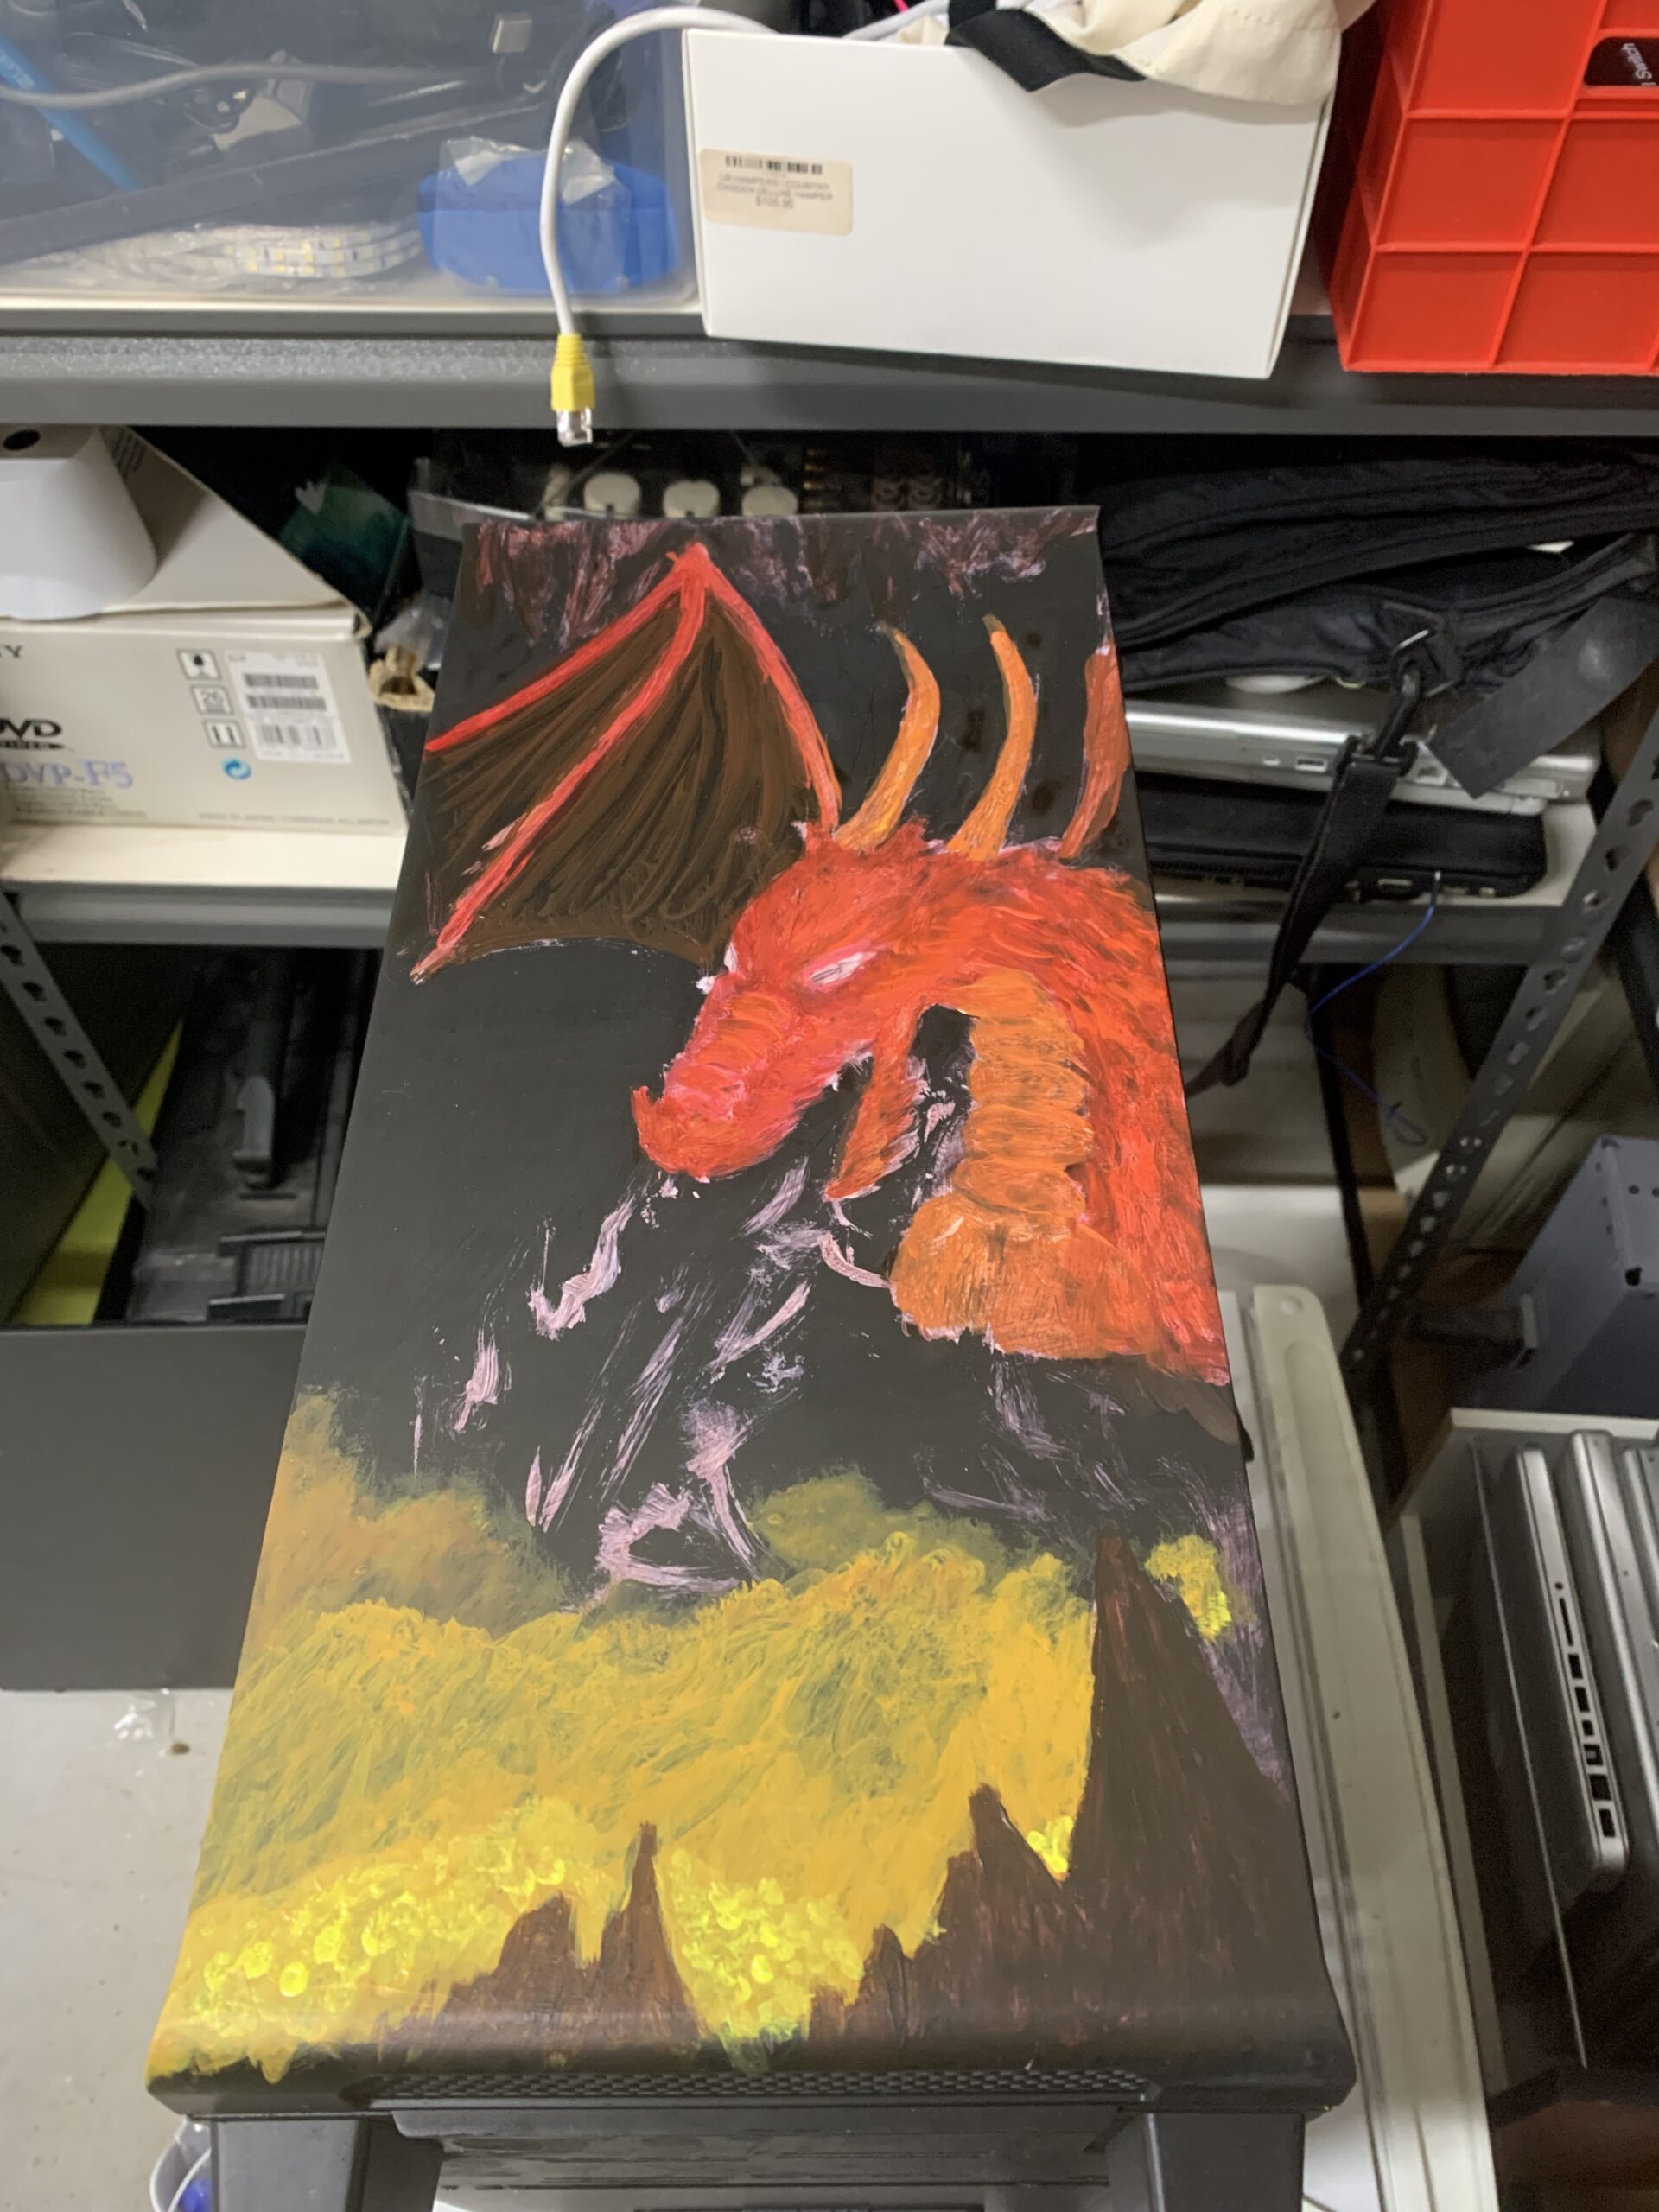
I start off with a pencil drawing directly on the case. While this is hard to see it does give me a general idea of how I want the dragon to look on the case and if I need to make some changes this is a good time to do it!
Because the paint is not going on as evenly as I would like I decided to take advantage of the texture created in this process!

Using a Wash to add richness of colour
A wash is where you take a super diluted layer of paint and cover the areas you would like to make that colour! Once again this does not look like much but the results will be worth it!
At this point, I am still not worried about the details! I am however working with darker colours! Each layer will slowly start to hide the white undercoat and replace it with a dark deep red! I make sure that each layer of paint is slightly different. Sometimes I will add a little bit of black to the wash.

So many Layers
Just like working with photoshop layers is important. And while this still does not look like much this process will make this computer case look amazing. (At least that is what I am hoping)

STarting to take some shape
As you can see working with washes does take time but is worth it in the long run!
Painting the mounds of gold is going to be the toughest part of this painting. I need to give it enough detail to show the gold coins but not to the point where it overwhelms the rest of the image.
So I am adding the texture to the bottom layer of the computer case. As the mounds of gold are further back the colors will not be as bright.
Now comes the hardist part … Walking away for awhile
You would think with the high paced would we live it that it would be a snap and keep painting! The problem is that with this kind of art you need to walk away! The reason for this is that the paint need to dry! I also need to clear my head and come back with fresh eyes.
When we come back I will show you how I am going to use my airbrush to add smoke effects to the painting. I will also talk about what I am doing to keep the clean lines on the computer case….. it is not what you think 🙂
Discover more from LithGeek Custom Gaming Computers
Subscribe to get the latest posts sent to your email.
by
Tags:
“Lithgow Tech Services”, airbrushing pc mods, AU computer case mods, Computer case artist, computer case mods, Computer fix 2780, computer repair Bathurst, computer repair Wentworth Falls, computer shop Portland, Computer store, custom case mod, custom gaming computer case mods, custom gaming PC Lithgow, custom gaming rigs, custom pcs NSW, detailed pc case mods, dragon case mod, Dragon painting case mod, gaming computers Penrith, gaming hardware Blue Mountains, gaming pc modding, gaming PC setup Leura, hand-painted PC case, Katoomba computer Repairs, Lithgeek computer shop, Lithgow tech services, NSW computer case mods, Painting computer case, PC building Katoomba, pc gaming accessories Blackheath, PC Repair near me, pc upgrades Emu Plains